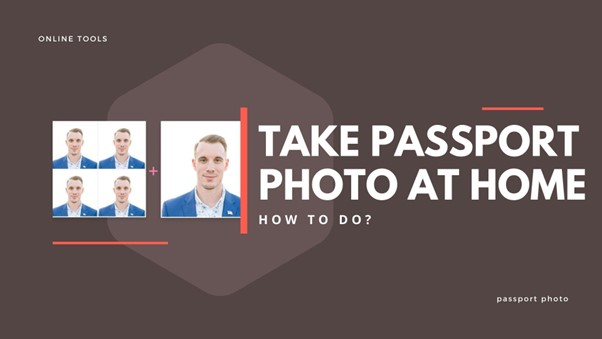
When you want to obtain or renew a passport, one of the essential requirements is a passport photo. Passport photos come with precise dimensions. However, if you possess your camera and possess the ability to crop images, you might be pondering: “Can I take a passport photo with my phone?” The response is Yes. In this article, we’ll guide you through the step-by-step process of how to take a passport photo at home – a professional-quality passport photo – in the comfort of your own home.
Using online tools to take a passport photo at home
If you want to take a passport photo at home, you have to choose a reliable tool to make your passport photo quickly and make sure that all the requirements for the passport photo are made. Among all the websites to create passport photos at home available nowadays, Passportmaker.ai is one of the best tools. It offers users a wide range of passports from many countries with different backgrounds and sizes, you also don’t need to worry about the privacy of your photo because passportmaker.ai is absolutely safe.
Here are the step-by-step guides for you to use passportmaker.ai these are the factors to consider an acceptable passport photos:
Step 1: Use your smartphone or a digital camera for higher quality
You can find someone to take the photo for you, or you can use a tripod. A tripod will make it easier to keep the camera steady and level because a selfie photo is not acceptable for a passport photo application.
Step 2: Find a suitable area with a plain background and sufficient lighting.
The background color of your passport may differ slightly depending on your country. In most countries, a plain white background is more commonly used. Ensure there are no subjects other than the photo’s subject. Therefore, choose a shooting location with a seamless background, such as a wall or a smooth background. When taking photos, position yourself facing a light source, such as a well-lit window or door. This will provide even light, preventing shadows from falling on the face and background.
Step 3: What to wear when taking passport photo
The clothes that you wear when you take photos depend on the requirements of your country. Some countries will require citizens to wear white shirts to take photos. If you can show your ears, even better. There are some common questions that people who take photos to make passport photos often confuse with their glasses or hair:
Step 4: How to pose for a passport photo?
- Face the camera directly with your head held straight and not tilted or turned.
- Make sure both ears are visible or that both sides of your face can be seen even if your hair covers your ears.
- Your shoulders should be in the frame, and there should be sufficient space around your head to allow for cropping of the photo.
- Position the camera at the same level as your head.
Step 5: Use a reliable tool to make passport photo online
There are many online passport makers that appear to help users create a passport photo. So, we will guide you to use passportmaker.ai, the online tool that we have recommended.
- Open passportmaker.ai. You can search the website on your web browser, such as Safari, Google Chrome, Microsoft Edge, etc. Or you can access the tool directly: https://passportmaker.ai/
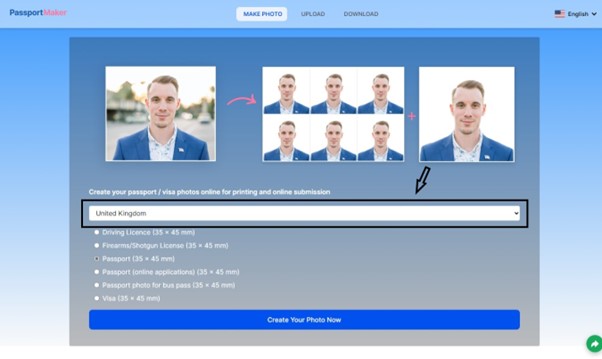
- As you can see on the main screen of passportmaker.ai, there will be an option for you to choose the country. After that, choose the type of card or passport for that country.
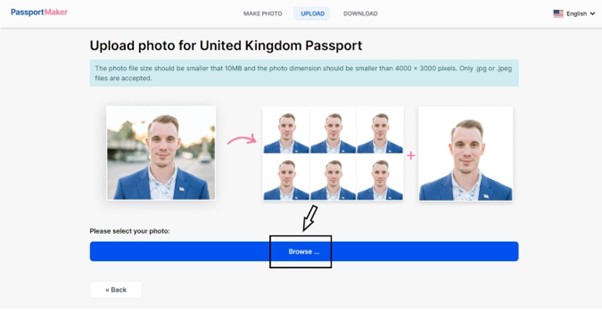
- Then click “Create your photo now” and click browse to upload your photo. The AI will automatically create your passport photo.
When creating a passport photo online, several common problems can arise:
Before answering the question:” How to take a passport photo at home?”, you should understand some common problems that taking a passport photo at home might have to avoid:
Incorrect Photo Format: Using the wrong file format or size may result in a photo that doesn’t meet official requirements. As you can see in the example below, the difference between a 6×4 photo and a 2×3 photo is not small at all. So be careful when choosing your passport photo size.
Wrong photo size (source: passport-photo.online)
Low Resolution: Uploading low-quality images can lead to a blurry passport photo.
low-quality photo
Background Issues: Some online tools may need to provide a suitable plain or light-colored background, which is essential for passport photos.
background requirement for passport photo
Inaccurate Photo Editing: Over-editing the photo or using filters can result in an unrealistic image, leading to rejection.
Inaccurate Photo Editing
Lack of Verification: Some online services may need to verify if the final photo meets the specific passport requirements.
Privacy and Security Concerns: Uploading personal photos to specific online platforms may raise privacy and security issues.
It is critical to employ credible and trusted online passport photo services to solve these typical issues. To ensure compliance with official criteria, always double-check the photo’s dimensions, resolution, backdrop, and facial expression. To avoid any privacy or security problems, use official government websites or authorized services whenever possible.
Conclusion
Taking a passport photo at home is not as difficult as it appears. You may generate a high-quality passport photo that meets all of your country’s passport office’s requirements by following the appropriate steps and paying attention to the rules. Remember to assemble the appropriate equipment and choose a suitable place with adequate lighting, and thoroughly check the final photo before printing and sending it with your passport application. Read this post carefully to see the guides on how to take passport photos at home with an iPhone or Android.
So take your camera, find a good spot, and say cheese! You’ll have a great passport photo in no time for your next journey.
FAQS
“Can I wear glass in passport photo”
Avoid wearing eyeglasses, sunglasses, or tinted glasses for your passport photo. Make sure your face and facial features are clearly visible. Hair for passport photo should not cover your face and obscure your features.
“Can I smile in passport photo?”
The answer is yes; you can still smile, but just curl the corners of your mouth and smile a little, but not completely.